Showing posts with label recipe. Show all posts

Saturday, August 6, 2016

Paleo Overnight Chia Pudding

I like to hit snooze in the mornings. And when I say I like to, I mean I really, really like to. So much that Jon knows that when I say I have to get up at 6:00am I actually mean 6:45... It drives him nuts but for some reason I feel the need to have several reminders before I actually have to get up. Does anyone else do this?

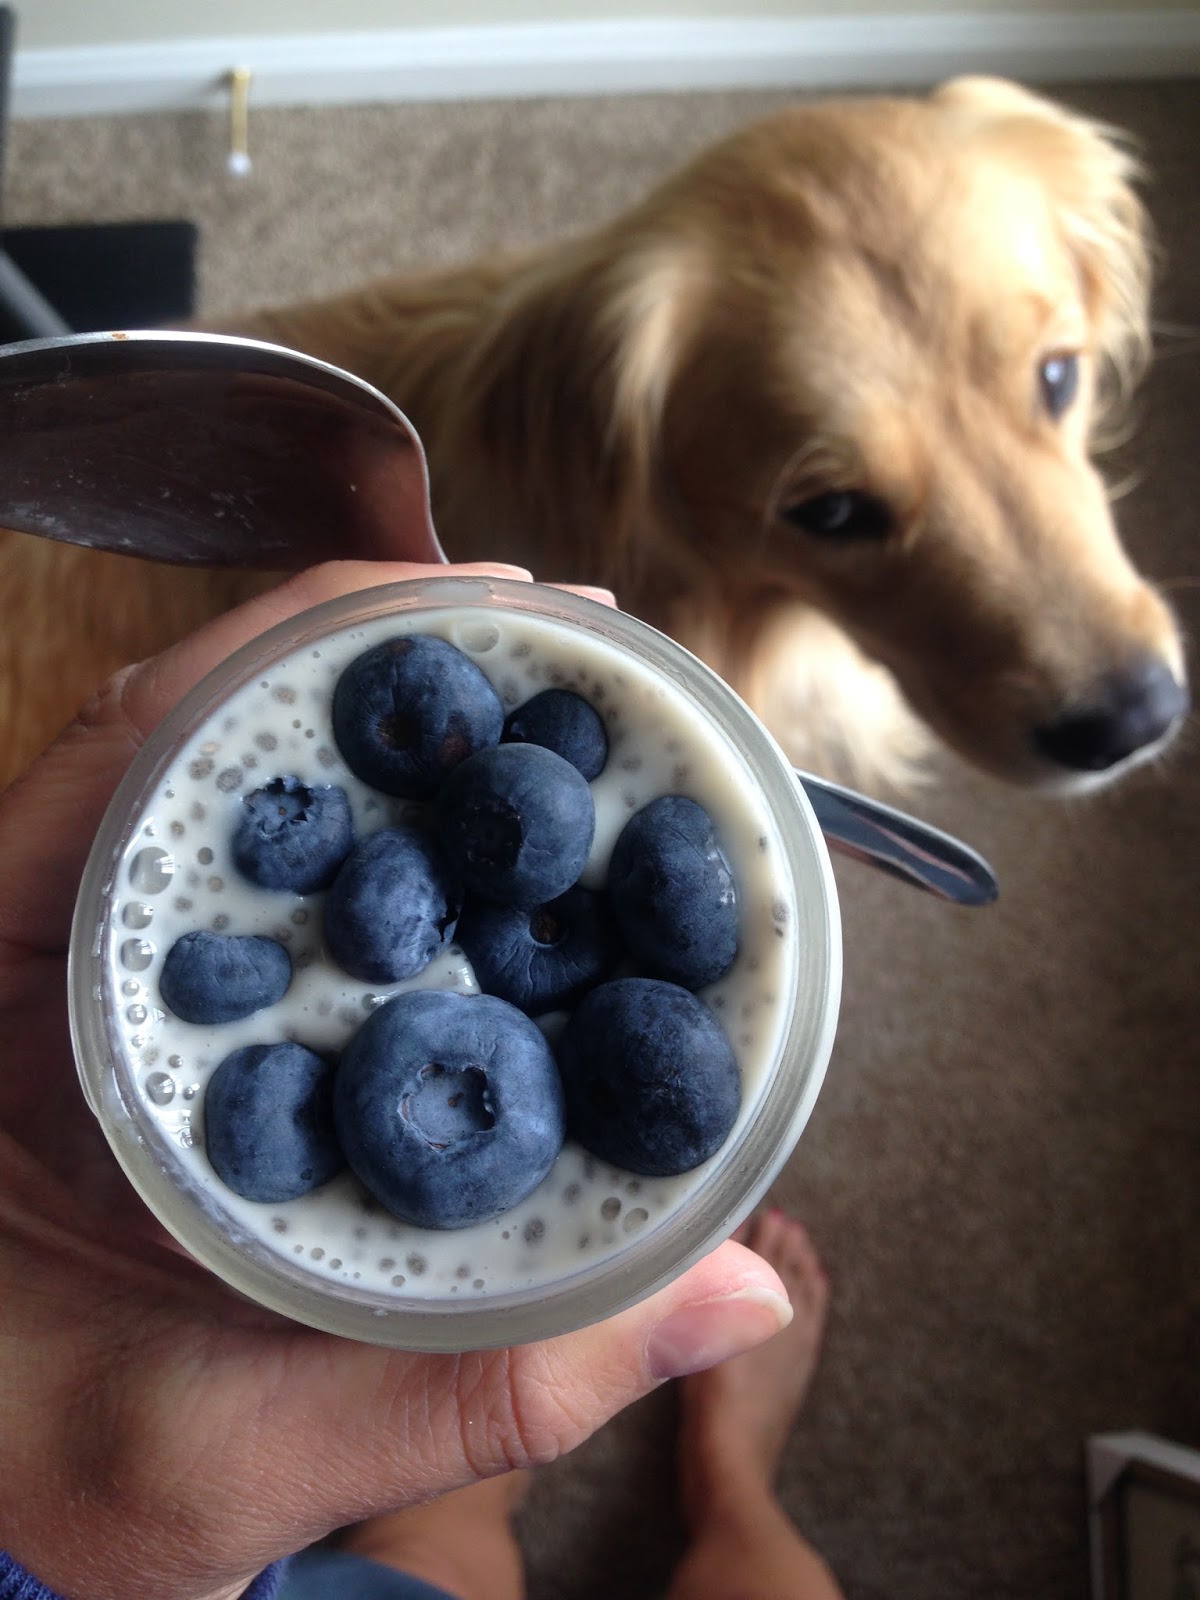
Because I'm a lover of sleeping in a little bit later than I should I am a huge fan of this overnight chia pudding. It's takes seconds to make and looks so adorable in the half pint size mason jars. Food always tastes better when it's served in a mason jar. And when you have an adorable puppy nearby ;)


(P.S. this is Navajo and this is his first appearance here on the ol' blog! He is the service dog that we are currently training - follow him on Instagram @give_drop_leaveit to keep up with his adventures)

Paleo Overnight Chia Pudding


Ingredients
3/4 cup unsweetened almond milk
3 tbsp. chia seeds (the more you add, the thicker the pudding will be)
2 tsp. maple syrup
1/2 tsp. vanilla
fresh berries, nuts, coconut flakes; optional

Directions
1. Put everything (except the berries) in a mason jar and shake well. The half pint size jars work perfectly.
2. Let sit in the fridge for at least 5 hours but overnight is best
3. Shake, shake, shake! Top with your favorite toppings and enjoy straight outta the jar.


Sunday, February 7, 2016

Game Day Dip

Every time Jon and I head to a party we take a huge batch of buffalo chicken dip. It's so easy to make and you are guaranteed to go home without leftovers. A win-win in my book.

We were planning on taking our infamous buffalo chicken dip to this year's Super Bowl party until we heard that another guest already claimed the dish! While there is no such thing as too much buffalo chicken dip, I figured I would whip up something a little different.

I knew I couldn't go wrong with a cheesy, bacon and ranch dip!


It was actually easier and quicker to make than buffalo chicken dip because I didn't have to cook the chicken first. All I did was throw all of the ingredients into a big bowl, mix, pour into a dish, top with a little extra cheese (because a little extra cheese never hurt anybody!), and bake!


I am a huge fan of this measuring cup! It's perfect for measuring out creamy ingredients because it gets every last bit.  I highly suggest it for any recipe that uses sour cream, peanut butter, honey, etc. 


After mixing your ingredients, pour them into a baking dish, top with a little more cheese and bake.


I'm taking a huge bowl of wavy potato chips with us to the party tonight but any tortilla chip or veggie would be amazing too!


Game Day Dip Recipe


Ingredients:
1 block cream cheese, softened (8 oz)
2 cups sour cream (16 oz)
2 cups cheddar cheese, shredded
3 ounces bacon bits
1 packet ranch mix

Directions
1. Preheat oven to 400 degrees.
2. Put all of the ingredients into a bowl and mix thoroughly.
3. Pour the mixture into a 1.5-2 quart baking dish and bake for 20-25 minutes
4. Serve with potato chips, tortilla chips or veggies and enjoy! 


Question of the Day

What are you taking to your Super Bowl party?


Tuesday, October 27, 2015

Fit Body Bakery Review, Recipe, and Giveaway

You are in for a real treat today - a product review, discount code, recipe, and giveaway! You would think I like you all or something ;)


When the Motivator Muffin and Burnin' Brownie mixes arrived at my door I immediately opened them up and started having some fun in the kitchen! With fall right around the corner (at least I'm hoping as it's been a cool 80 degrees down here in Florida), I figured that baking up anything pumpkin was totally acceptable!


Now these aren't your typical baking mixes - they're insanely low in sugar, packed with protein, and gluten free! If muffins and brownies aren't your thing they also have Conquer It Cookie and Power Up Pancake mixes - yum!

The first box that I opened up was the Motivator Muffin mix. I quickly gathered the ingredients I needed and began pouring, mixing, and filling up baking cups.


When I put the muffins in the oven I got right to my Baketime Workout- No Mo' Muffin Top! This workout was easy to follow, fun, and worked up a quick sweat especially in a hot kitchen! It also made me feel a little bit better about indulging in a few sweet treats in the near future ;)


After the workout it was time to take my delicious treats out of the oven. After letting them cool, I was finally able to taste one and boy was it delicious! I took a few to share with my fitness-fanatic friend who also enjoys healthy and delicious treats and she gave these two-thumbs up! I also shared with her my super-secret code for 15% off: SP15. Actually this isn't a secret but it's an awesome deal and a great way for you to get your first box at an even lower price! But hurry, it expires November 30, 2015! 


And now that you've used the code and bought the Motivator Muffin mix, here is a super delicious and easy fall recipe for you to enjoy!

Chocolate Chip Pumpkin Muffins 


Ingredients:
1 can pumpkin pie puree
1 tbsp. pumpkin pie spice
1/2 cup Enjoy Life chocolate chips (these are gluten free) + a few for topping

Directions:
1. Prepare the muffin mix as directed on the box but omit the applesauce and add the pumpkin puree, pumpkin pie spice and chocolate chips.
2. Either grease or line a muffin tin with cupcake liners and fill 3/4 full.  Top with a few more chocolate chips and gently press into the batter. 
3. Bake according to the directions on the box and enjoy!


Giveaway

Fit Body Bakery has also offered to give one lucky reader a baking mix of their choice! To enter the giveaway use the Rafflecopter below. A winner will be chosen on Saturday October 31st as a Halloween treat! 

Rules: US only. One prize per winner (If you have entered a Fit Body Bakery giveaway through another blog and have won please disclose that information when you are contacted so a different winner can be chosen - we want to spread the Fit Body Bakery love!) 


Disclaimer: Through my affiliation with FitApproach and SweatPink, I received this product for free in exchange for a review and recipe. As always, all opinions are my own.

Wednesday, September 23, 2015

Artisana Organics (Review and Giveaway)

The first time I teamed up with Artisana Organics I was still living in the dorm rooms in college and cooking was almost nonexistent. The only appliances I had were a mini fridge, a microwave, and a Keurig which didn't leave me a whole lot of room for experimenting in the kitchen. Heck, I didn't even have a kitchen!

Since then I've been a huge fan of Artisana and their products! If you've been following the blog for awhile you have probably noticed a trend in most of my smoothie recipes - almost every single one of them includes an Artisana nut or coconut butter of some kind.


Lately my favorite has been the Raw Coconut Butter. It's dense, melts in your mouth, and adds a delicious flavor to my smoothie - or spoon because it tastes amazing that way too ;)

All of their products are fresh, high quality, organic, and nutritious. I also love the convenience of their squeeze packs. Taking nut/coconut butters on the go has never been easier!


Here are my favorite smoothie recipes using the raw coconut butter:


Artisana also has other products including chocolate bars! I am dying to try these but have yet to find them in stores. Hey Artisana, if a huge box of these randomly arrived at my door I wouldn't be mad at all, haha!

Now it's time for the fun stuff - a giveaway just for you! 

Artisana is offering to give one lucky reader 2 8oz jars and a variety of squeeze packs! Talk about a delicious giveaway. All you have to do is enter the Rafflecopter below and a winner will be notified via e-mail.

 There a ton of different ways to enter, just be sure to follow all the directions for the different ways to entry - also, some entries can be done every day. Good luck!


Monday, September 21, 2015

Peanut Butter Jelly Time

It's peanut butter jelly, peanut butter jelly, peanut butter jelly, peanut butter jelly, peanut butter jelly with a baseball bat... 

If you've been so fortunate to have never heard the song "Peanut Butter Jelly Time" consider yourself very lucky. Every single time I make a PB&J or this PB&J Smoothie I start singing the song and it gets stuck in my head for days! I'm not sure if the song ever was popular but I remember in middle school my best friends and I made up a dance to go along with the song. One of the girls video taped the entire thing and I am crossing my fingers that it is long gone!


Dancing isn't my forte but creating delicious smoothies? Now, that's something I'm good at!

This smoothie recipe is easy and if you have a peanut allergy you're in luck because this one is peanut free!


PB&J Smoothie


Ingredients:

1 frozen banana - this is easier to use if you cut it up before freezing
2 tbsp. Strawberry fruit jam - check your ingredients - there are paleo versions out there
2 tbsp. Easy Homemade Almond Butter
1 packet of Artisana Organic raw coconut butter OR 1 1/2 tbsp. Artisana Organic raw coconut butter
1 tsp. Chia seeds
Almond milk - use enough to get everything moving

Directions:

Place everything in a blender, mix, and enjoy!

It's that simple, my friends!


Questions of the Day

Are you a peanut butter and jelly fan? Have you ever made up a silly dance with your friends to go along with a song? 

Thursday, September 17, 2015

Easy Homemade Almond Butter

You guys, I may have just discovered my new favorite thing.

Homemade almond butter.


Yes, the stuff from the jar is good and all but sometimes it's hard to find a clean almond butter at the store that doesn't cost you an arm and a leg. Plus if you actually take a moment to stop and read the labels in the grocery store you will find that most "healthy" things are loaded with a bunch of unnecessary crap. Pardon my French but one label I read said that the almond butter was made from 'almonds, flax seed, wheat germ, dehydrated cane juice, egg white.' What?! Is that even almond butter?

By making your own you can save money and be in control of what goes in your almond butter.

If you've never tried the homemade version, you must! I don't think I can ever go back to the store bought butters, even if I do buy the healthiest version on the shelf. This homemade almond butter, served up on the spoon, immediately after the batch is done, is one of the most amazing things I've ever eaten. And that's saying something! Plus it's made with one ingredient and one ingredient only - almonds! Are you surprised? ;)

Almond Butter Recipe

Ingredients:
2 cups whole unsalted almonds (Use organic if possible)

Directions:
1. Put the almonds in the food processor on high
2. Walk around, do the dishes, start making dinner and come back to scrape the sides of the bowl every few minutes.
3. It will take about 15-20 minutes until you will have the creamiest, most delicious almond butter around!
4. Grab a spoon and enjoy! Spread it on fruit, bake with it, or put a spoonful in your morning smoothie. Store any extras (if there are any) in an airtight container in the fridge.

This recipe makes about 1 and 1/2 cups of almond butter.


Thursday, September 10, 2015

Peanut Butter Brownie Bites

Earlier this week as I was cooking dinner I saw my KitchenAid sitting in the corner, unloved and collecting dust. I'm pretty sure the frequency of my baking has a lot to do with the size of my counter and oven! I definitely lost a lot of kitchen space when we moved so it makes baking and cooking a bit of a challenge. As I was cooking I was trying to think of something to make for dessert that Jon would love. I figured that chocolate and peanut butter would do the trick. I mean, who doesn't love that combo?!

I thought about making brownies drizzled with peanut butter but then I would have to make one huge pan. I decided that baking individual desserts would be much more fun! Plus I always feel 10x better seeing mini individual brownies disappear than one giant pan!


After doing a bit of brainstorming, these Peanut Butter Brownies Bites were born!


You've seriously got to make these.


Peanut Butter Brownie Bites


Ingredients

1 1/4 c. sugar
11 tbsp. butter (1 stick + 3 tbsp)
1 tsp. vanilla extract
3/4 c. unsweetened cocoa powder
2 eggs, cold
1/2 c. all-purpose flour
1 1/8 tsp. baking soda
1 tbsp. arrowroot powder (can substitute with cornstarch)
1/4 tsp. salt
1 cup peanut butter
chocolate chips (optional)

Directions

1. Preheat the oven to 350 degrees.
2. In a microwave safe bowl, heat the butter and sugar together for 1 minute 30 seconds. Remove, stir until mixed, and cool for 5 minutes.
3. Once butter/sugar mixture has cooled, stir in the vanilla extract and cocoa powder.
4. Pour the butter/sugar mixture in the mixing bowl and slowly add in the eggs one at a time.
5. In a bowl, mix together the flour, baking soda, arrowroot powder, and salt. Turn the mixer on low and slowly add the dry ingredients to the butter/sugar mixture. Mix until no flour pockets remain.
6. Grease a muffin tin and evenly distribute the brownie mixture into 12 brownie cups.
7. Place in the oven for 18-20 minutes. Remove from oven and let cool for 5 minutes. Flip the brownies over onto a baking sheet or plate.
8. Take a small spoon to remove some of the brownie from the center of each cup. Be careful not to go all the way through the bottom of the cup.
9. Place a spoonful of peanut butter into the center of each brownie and top with chocolate chips (optional).
10. Enjoy immediately or allow to cool so the peanut butter has a chance to set.

I preferred these still warm with gooey peanut butter while Jon liked them better after they cooled so it's totally up to you! I suggest trying them both ways, I know I did ;)


Tuesday, September 8, 2015

Not-Your-Average Strawberry Banana Smoothie

When I have a few extra minutes in the morning I like to treat myself to a delicious smoothie rather than my usual banana/fruit and nut bar combo. Lately I have been loving this "Not-Your-Average Strawberry Banana Smoothie" that I whipped together.


Most strawberry banana smoothies have - you guessed it - strawberries, bananas, and milk as their only ingredients but I've amped this one up to add a burst of extra vitamins, minerals, healthy fat, and protein!


Recipe


Ingredients
1 frozen banana (Note: it's much easier to blend if you slice it before freezing - using frozen bananas replace ice cubes)
1 handful of strawberries
1 tsp chia seeds
1 packet Artisana raw coconut butter
enough almond milk to get things movin'

Directions
1. Put everything in a blender and blend until smooth
2. Enjoy!


Tuesday, June 23, 2015

Paleo Chocolate Chip Banana Muffins

A couple of weeks ago, Jon's mom gave me a bunch of bananas that were getting brown. I have found that when bananas start getting brown spots all over them, most people will not eat them whatever they do. I on the other hand, will. Unfortunately, I left this bunch go a little too long so I decided to make a batch of muffins that I could quickly grab for breakfast throughout the week. I thought about taking them into work one morning but that thought quickly left my head when I ate my first one! These muffins are soft, stay moist all week long, and are the perfect grab-and-go breakfast!


Recipe


Ingredients
3 bananas, mashed
3 eggs, whisked
1/4 c. pure maple syrup
1 tsp. vanilla extract
1/2 c. smooth almond butter
1/4 c. coconut flour
1/4 tsp. cinnamon
1/2 tsp. baking soda
1/2 tsp. baking powder
1/8 tsp. salt
1/2 c. Mini Enjoy Life Chocolate Chips

Directions
1. In a mixing bowl, combine bananas, maple syrup, vanilla extract, and almond butter. 
2. Slowly add in all dry ingredients and mix well. 
3. Scoop batter into silicone baking cups or silicone muffin pan and bake for 25 minutes at 350 degrees. 
4. Cool muffins before removing from baking cup.
*Note - these muffins do not rise much, so feel free to fill the baking cups a little over 3/4 full. 

Yields 9-12 muffins


Thursday, June 11, 2015

Creamy Black Bean Dip

Tomorrow at work we are surprising our clinic manager with lunch to show her how appreciative we are of her. We didn't want to ruin the surprise by asking her what her favorite foods were so we decided that Mexican was a safe bet. I mean, seriously, who doesn't like Mexican food? I could eat chips and salsa every single day.

The taco/nacho meat, chips, tortillas, and toppings were all covered so I told everyone I would be in charge of the dip, guacamole, and salsa. Those are the best parts in my opinion. 


I was browsing Pinterest for a delicious dip but couldn't find anything different from your typical 7 layer dip. I found a white bean recipe, tweaked it, and came up with my Creamy Black Bean Dip. The best part? It's somewhat healthy, packed with lots of flavor, and can be eaten with chips or veggies!


Warning: You may want to make 2 batches of this dip. I made one batch to serve with dinner tonight and another for tomorrow and I'm so glad I did!

Cheesy Black Bean Dip Recipe


Ingredients
1 (15 oz) can black beans, rinsed and drained
1 (14.5 oz) can diced tomatoes, drained
1 cup sour cream
1 jalapeño (seeds are optional)
1 cup shredded Mexican cheese, halved
1/2 tsp. salt
1/4 tsp. pepper
Optional toppings: diced tomatoes, green onions, cilantro

Directions
1. Put black beans, diced tomatoes, sour cream, jalapeño, 1/2 the cheese, salt and pepper in a food processor and blend together until creamy.
2. Pour the mixture in a greased baking dish, top with remaining cheese, cover with foil, and bake for 10 minutes at 350 degrees.
3. Remove the foil and bake for an additional 15 minutes, until the cheese is bubbly.
4. Top with optional toppings and serve with tortilla chips, veggies, or pita chips. 


Sunday, April 12, 2015

Pineapple Siracha Baked Chicken Thighs

This past week I had to travel every day except for Friday! I had no time for cooking or hitting the gym so today I have been prepping some foods for the coming week and mentally preparing myself for 5 days of CrossFit this week.

On Tuesday last week I traveled up north to Fort Wayne for the Vera Bradley Outlet Sale. Each year several family members go to the sale and this year I was lucky enough to get tickets. I loaded up the car with Oden's things (the little girl I watch) and we were off! We met my aunt for lunch and then headed to the sale with the rest of the family later that afternoon. At the sale my aunt and uncle took Oden off in one direction to shop and when we met back up she had the cutest little Vera Bradley bear that she picked out! I also walked away with several awesome deals!

I didn't do my usual big shopping trip this week because I didn't have any time to sit down and plan so after a little Pinteresting and thinking about what I already had on hand, I came up with this recipe for Pineapple Siracha Baked Chicken Thighs.


This was so delicious! The chicken was juicy, sweet, and spicy. I love spicy things and this recipe can easily be tailored to be more or less spicy. The amount of siracha I added was perfect for me but may be a bit too much for you, so just play around with it a bit! You can always add a little more at the very end once it comes out of the oven.


Pineapple Siracha Baked Chicken Thighs Recipe


Ingredients

1.5-2 lbs. bone-in chicken thighs

Dry Rub
1 tsp. salt
1 tsp. pepper
1 tsp. garlic powder
1 tsp. paprika
1 tsp. chili powder

Glaze
olive oil
1/2 medium onion, diced
1 clove garlic, diced
1 20oz can diced pineapple, separate the juice from the chunks
1.5-2 tbsp. siracha hot sauce
2 tsp. cornstarch

Directions

1. Mix together all of the dry rub ingredients in a small bowl
2. Rub the dry rub generously over the chicken thighs
3. Place in a 9x9 baking dish
4. In a medium saucepan over medium heat, sauté the onion and garlic with a little olive oil until the onions are translucent
5. Add the pineapple juice, siracha, and cornstarch to the pan, stir and let simmer for 5 minutes
6. Add the pineapple chunks to the glaze and let it simmer 2-3 more minutes
7. Pour the glaze over the chicken thighs
8. Bake at 375 degrees for 45-50 minutes

Wednesday, March 25, 2015

Double Chocolate Chip Paleo Protein Shake

As I've stated before, I'm really bad at getting out of bed in the morning. Really, really bad. But this morning I was able to wake up right away with a little help from my needy kittens. They have taught themselves that the alarm corresponds with them getting fed so when the alarm goes off, they jump all over the bed and meow until I get up. Somedays I can sleep through it, others I can't.

What am I supposed to do with all of that extra time? Instead of sit on the couch until it was time for work, I decided to make a healthy and delicious protein shake for breakfast. It included lots and lots of chocolate. What better way to start a Monday morning than with chocolate? I'm pretty sure I will have the best week ever because of it!


A few weeks ago, Artisana was kind of enough to send me a few samples of their coconut butter squeeze packs. I absolutely love coconut so these have been perfect for adding to my morning smoothies or for quick pre-workout fuel.

I have also heard that by combining coconut butter (or oil) with chia seeds you are bound to have a ton of energy! I honestly didn't even need my morning coffee this morning because I didn't feel sluggish after drinking this.

This smoothie can easily be tailored to fit what you have on hand. For instance, if you don't follow a paleo diet, use regular milk & whatever protein powder you have on hand. If you do follow the paleo diet, I highly recommend you check out the Enjoy Life chocolate chips. I am able to find them at Meijer and other health food stores and they are soy, gluten, dairy, egg, peanut, casein, potato, wheat, fish, sesame, shellfish, tree nut, and sulfite free! The dark chocolate chips do contain cane sugar, but if you aren't crazy strict on your paleo diet, I say they're ok every now and then ;)


Thursday, March 19, 2015

Flourless Almond Butter Chocolate Chip Cookies (Paleo)

I have a delicious recipe to share with you all but first a story about the "heart attack" I had today.

This morning on my way to work I was in a bit of a hurry. I really like hitting the snooze button (like a lot) which doesn't leave me with a lot of extra time to make breakfast. Today was one of those days. Heck, almost everyday is one of those days. So I threw a banana, some almond milk, almond butter, chia seeds, protein powder, and spinach into a blender and ran out the door.

When I got home and went into the kitchen I had a mini heart attack because I thought that tiny little bugs took over my kitchen counter! I was so grossed out. Then I took a closer look only to realize I spilled some chia seeds on the counter during my morning rush! What a relief! I honestly don't know what I would have done had there been a million little bugs all over my counter. 

So after I cleaned up that mess, I made these.


I experimented with a flourless cookie recipe I already had and swapped the peanut butter for almond butter, added a few chocolate chips, and used maple syrup instead of honey. I also topped them with a pinch of sea salt for the most delicious sweet and salty taste. These cookies were super soft and chewy too! 


I enjoyed my cookie with a big, cold glass of almond milk. The perfect afternoon snack!


I'm thinking that these would be an amazing breakfast cookie. Especially since I suck at waking up on time. Maybe I'll experiment by throwing some protein powder into the mix next time. 

Recipe

1 c. almond butter, refrigerated* 
1/3 c. pure maple syrup
1 egg
1 tsp. baking powder
1/2 tsp. salt
1 tsp. pure vanilla extract
1/3 c. Enjoy Life chocolate chips

* I keep my nut butters in the fridge so this could make a difference if yours is room temp

Directions

1. Preheat oven to 350 degrees.
2. Mix all of the ingredients in a medium size mixing bowl until creamy.
3. Mix in the chocolate chips
4. Place by the spoonful on a baking sheet that has been lined with parchment paper or a non-stick baking mat. Sprinkle each cookie with a few extra chocolate chips and a pinch of sea salt.
5. Bake for 12 minutes. Transfer cookies to a wire rack to cool.

Yields: 1 dozen cookies

Enjoy!


LinkWithin

Related Posts Plugin for WordPress, Blogger...